
You can tile a fiberglass pool in order to add some elements of beauty, style,
While it might sound a little complicated on the basis of the materials used, installing tiles on the fiberglass pool isn’t rocket science. The procedure is more or less the same as that you would use for the regular tile installation.
With the right tools, procedure, tile, and determination, you can actually achieve this feat without any stress or damage to your pool. Most importantly, you need to check on the weather forecast to choose the appropriate day and also, you need to find one or a handful of helpers to lend a hand in the grouting work. In this way, your work will get done within the shortest time possible.
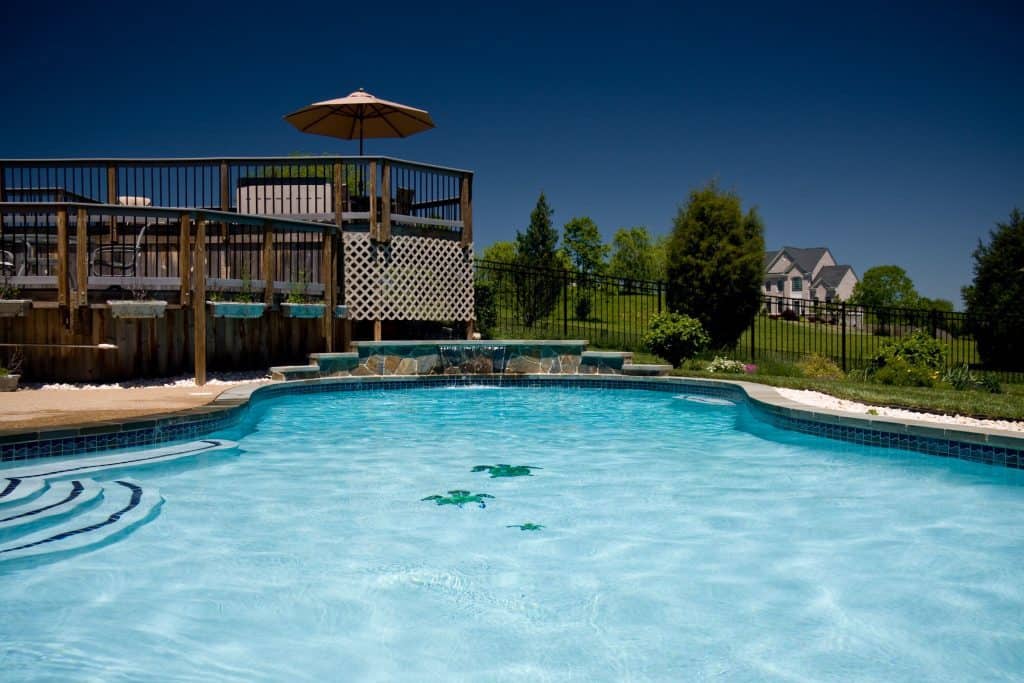
Tiles can transform your pool to look unique. They’re known to help accent your pool giving it added beauty and style in a pretty simple way. No matter what design you are looking to have, tiling a fiberglass pool is a simple project that does not require much technical know-how. The following simple steps will enable you to accomplish this task perfectly and quickly. But before we go there, you need to know a little about tile and pools and the designs.
Types of Tiling in Fiberglass Pools
Basically, there are three major techniques used in tiling fiberglass pools. These are
Water Line Tiling
Water line tiling is where you put one or more rows of tile around the top of the pool where the waterline will be.
You can use this type of tiling to make the tile be a part of the entire pool. Here are the advantages of using waterline tiling:
- The tiles accentuate and
beautifies the fiberglass pools and even spas - There is a wide range of colors and styles to choose from
- Silicone and tile grout are easy to clean ( it actually simplifies the waterline maintenance)
Over the Lip (Inlay) Tiling
When you use the Over the Lip, or Inaly, Tiling, the fiberglass pool actually has recesses for the tile and each tile is cut to fit into the recess. Inlay tile has the following advantages:
- Both the grout and the tile are easy to clean using a sponge or wet cloth. In this case, grout is guaranteed never to crack, dislodge or stain.
- There is no need for you to do waxing on the exposed fiberglass lip
- The tiles will not snag your bathing suits as witnessed with bricks or cantilever cement
- Every tile installation using over the lip method is custom made for the purpose of fitting the pool, customer’s needs and the deck.
- The selection of tiles and colors is carefully done to make sure that there is an attractive combination of colors for a perfect match on the mud cap, lip tile
and waterline. - The installation can be done right at the factory or on location
The issue with inlay tile is that when (not really if) the tile comes out then getting a new custom tile to fit the tile recess can be really expensive. Especially if you did something really custom like an animal shape.
Custom Tiling throughout the Pool
This type of tiling involves working on the entire surface of the fiberglass unit for ultimate durability and luxury.
What you need before the task
- Acetone
- Piece of cloth
- Pool tile sheets of about 6-by-12-inch
- Silicone tile adhesive
- Silicone rubber grout
- Epoxy rubber grout float
- A helper for grouting
- Nylon scrubbing pad
- Bucket
- Dish soap sponges
How to go about with Tiling a Biberglass Pool
As mentioned earlier, you can add style and class to your fiberglass pool by using tiles at the bottom. As a matter of fact, glass tiles are known to add that picturesque shimmering bottom to your pool especially when it was previously dull. Here are the steps you need to follow when installing tiles to your fiberglass pool
Step 1: Preparing the Fiberglass Pool
The most important rule that should always be at the back of your mind is never to install the tiles in water. This means that you need to start by draining the swimming pool and then get rid of excess water completely using a wet vacuum or a piece of cloth.
After drying the bottom side and edges of the pool, sand the bottom part of it and sweep up all the dust and any debris before cleaning the bottom of the swimming pool using acetone. Leave the pool to dry before proceeding to the next step.
Step 2.Take the Measurements of the Tiles
For you to know how successful you can accomplish the task of installing tiles to the pool, it is important that to have full knowledge of the number of tiles you need and their sizes. Those glass tiles used in this type of the project usually come in sheets that are already connected by wire mesh.
Therefore, you can start by measuring the width of your pool in order to have a rough estimate the total number of tiles you will use so you may trim the excess. In case you discover that the tile is not even, you need to find a way of ensuring that all tiles are of the same size. As such, you will use the wet saw to cut the uneven tiles to make them look uniform.
Step 3. Apply the Adhesive
In most cases, you will be required to apply the adhesive to the floor of the pool directly before placing the tiles. In the case of this project, things are a little bit different. Here, you will have to apply the silicone tile adhesive to every tile in thin layers while preparing for the next step.
Use the spatula when applying the adhesive to the glass tile (apply at the bottom side of the glass tile) in a uniformly thin layer. Remember to spread the adhesive evenly at the back of the tile in readiness for installation.
Step 4. Install the Tile
Assess the pool so that you can establish the exact spot to start placing the first tile. You can begin from one of the far sides of your pool. Simply, place the first set of glass tiles while ensuring that all the edges of the glass tiles are against the wall prior to laying it flat on the floor.
Make sure the tile is flat and perfectly horizontal and then press on it carefully to make the adhesive stick on the bottom of the pool. Once the first tile is well placed, you can now take the next set and place their edges against the first glass tile.
With a lot of care, lower the second set of tiles onto the surface before pressing it down firmly until it is at the same level as the first set of tiles. Follow this sequence until the entire bottom of your pool is covered with the tiles completely.
Step 5. Grouting
Give it a little time to ensure that the adhesive is completely dry. On the average, it will take almost one hour to dry as required before moving to the next step. Check the instructions on your adhesive to make sure you’ve given it adequate drying time.
Some pool grout comes in a tube. Using the caulking gun, apply some caulk at the edges where the wall of the pool meets the tiles and in-between the tiles.
Other pool grout comes as an epoxy mix that requires you to mix equal parts epoxy and hardener. Most pool epoxy grouts give you about 3 hours of work time, so don’t mix it all at once. With this grout, you can use a putty knife to apply the grout between the tiles.
The whole process should cover every edge. You can use an epoxy rubber grout float to evenly spread the grout, although I prefer to just use the putty knife to scrape off excess. In the course of applying grout, use the piece of cloth or rag to wipe out the excess grout off the surface of the tile after scraping it with the putty knife.
Stop 6. The Final Touches
Take a small amount of the detergent and place it on the scrubber (nylon scrubbing pad). Use the scrubber to clean the grout thoroughly before rinsing off the soap using some fresh water. After that, remove the excess water using a wet vacuum and let it dry.
Mix water and vinegar well and then use the sponge to clean the tiles by wiping them clean. Check out to ensure that every part is perfectly done and let everything set for two days before filling your pool with water.
Important Tips
- Take your time to check the grout and adhesive labels for temperature restrictions. Certain types of adhesives need a temperature ranging from 40 and 100 degrees while others will work perfectly well in hotter and colder temperatures
- In case you realize that there is some grout remaining on the tiles, you can just scrub it using a scrape( with a razor-like scraper blade) or a nylon scrubber
- If it happens that you are installing tiles which are translucent, you need to spread the adhesive uniformly at the back of each tile using a putty knife or any other wide blade.
- You need to be on the watch out at all time to prevent the dripping of grout and adhesive in water and if it happens, you must retrieve it quickly.
The Final Thought
A pool installed with fiberglass tiles looks amazing, stylish and unique and you can always enjoy spending more of your free time there while cooling yourself. Even though it looks classy and expensive, surprisingly, the entire process is so easy that you may consider doing it yourself and within your budget. With the right tools, materials and procedure, nothing should prevent you from upgrading your pool to make it look breathtakingly beautiful. Thought it is advisable to seek the help of a professional to get it perfectly right.