
Removing old tiles—especially floor tiles—can be a difficult and exhausting job that often carries a high risk of causing damage. If you want to remove the tiles on your own you should expect a lot of work, noise, and dust.
That said, my wife and I remodeled two bathrooms in our last house and removed every tile with a hammer and chisel and then used a cheap scraper to remove the mortar from the floor. It wasn’t actually that bad. The tiles on the wall popped right off, it was the ones that were well adhered to the concrete slab floor that were the most work.
A lot of work, a lot of noise, a lot of dust
Presumably, very few people will find the tile removal work to be nice or enjoyable. That could be because she is simply not. To make it as easy and comfortable as possible, you should first clear out the room completely.
Every piece of furniture carried out afterwards does not have to be laboriously cleared of dust. Do not ignore the door to the room during your preparation work and glue it with a building foil. Otherwise, you will quickly find the fine construction dust throughout the entire apartment.
Now provide electricity in the room and an electric stamper with an approximately 25mm wide flat chisel attachment. In addition, you could possibly use some bucket, a shovel and a ladder.
In addition, the right clothing is indispensable. Protective goggles, for example, prevent the fine ceramic splinters from blocking your eyes
hurt. Sturdy footwear, a dust mask and work gloves are also very important pieces of equipment.
Just do not take the choice of proper and functional clothing lightly. Tiles laid in mortar bed are sometimes surprisingly heavy and sneakers do not provide sufficient protection against falling chunks.
At a glance:
Tile walls can be redesigned with little effort. Not always the old tiles have to be removed. Painting or pasting is one of the simple methods, but it is not always practical.
The preparation of the construction site is the “half rent”. With care, you avoid a lot of dust and dirt in other living spaces.
When removing tiles, which were placed years ago in a mortar bed, the follow-up work are significantly more complex.
With an electric stamper you make the job much easier. With smaller surfaces, however, you can also make fast progress with manual work.
Tiles fall at the right angle
Once you’re done, you can use the electric stamper to make work easier. Make sure that the flat chisel is at an angle of 45 degrees to the tile. Too flat, shatter the tile rather than remove it.
If, on the other hand, the angle is too dull, cut holes in the wall, which you may have to tamp down with difficulty afterwards.
Once you have disposed of all the tiles, you can remove the tile adhesive remaining on the wall with a sander and prepare the substrate for the new wall design.
Remove vs. beautify
Anyone who has made the decision to change the tiles in their own bathroom should consider carefully whether a proper renovation is pending or just a little cosmetics to be operated. For the small cosmetic procedure, there is the possibility to paint tiles that are no longer liked but still in good shape.
This simple way of color change is done quickly, does not cause dust and grime, and creates completely new visual impressions in a short time. Another way to quickly beautify the current tile wall is the sticking of another tile layer.
Here, however, caution is required. The permanent load-bearing capacity of the lower tile surface is always to be provided with a question mark by experts. In addition, this method creates an unsightly and much too thick wall construction. And especially with small bathrooms, it can arrive on every centimeter of room size.
Tile adhesive or mortar bed
Depending on how long the old tiles are already providing their service to wall and floor, the work processes in the removal of the plates – and especially the required follow-up work – can be very different.
With a little luck, your tiles have already been applied with tile adhesive. Unfortunately, I did not have that luck. My tiles were still placed in a mortar bed. This significantly increased the workload after the removal, because the wall had to be repaired in large parts and in several operations crucial and expensive. Here it was no longer enough to do simple repair work. The wall was first laboriously “fed” again with much plaster.
Remove tiles ?? There are these possibilities!
How to remove tiles without causing damage to the underfloor heating, can be found here. We present various ways to successfully remove tiles. Whether wall or floor tiles, kitchen or bathroom—to remove tiles for every situation, you will find on this page the appropriate assistance and valuable tips.
Anyone who acquires an existing property and wants to renovate or rebuild it, will eventually face the problem of having to renew the tiles. But even at some point you are tired of the old bathroom and would like to renew it from scratch, for example because the latest bathroom trends should find their way into their own home. But not only the bathroom offers the opportunity to deal with the topic of “tile removal”.
However, this also applies to the kitchen, the basement and other rooms in the house or apartment. Again, the floor and walls – the latter at least partially – tiled. When replacing the kitchen cabinets, the replacement of the tiles can be planned to completely renew the kitchen. Again, it is therefore important to remove the old tiles first.
But what options do I have to remove the old tiles? This should be explained in more detail below. Here, both methods that are used by professional craftsmen, but also those that are suitable for the hobby craftsmen, to the language. Of course, as usual, our tiling experts from our shop are there to help you with words and deeds.
Preparatory work
If you have completely cleared the bathroom or the kitchen, taped the windows and doors and the sanitary facilities with a foil, you can start removing the tiles.
Among other things, you will need a screwdriver, a miter, a chisel, a bucket for the debris, a stamper with a flat chisel attachment or a hammer drill, a construction bucket, a dustpan with a broom, protective goggles and a protective mask.
The use of an industrial vacuum cleaner is also useful to absorb dust and small chunks of old adhesive or tiles. Also provide the sack of tile adhesive , the grout and the new tiles that you can buy, for example, in our online shop.
The simplest variant
The easiest way is certainly the laying of new tiles on old tiles. The latter must be completely intact. Also, there must be no major damage in the joints or in the wall. Otherwise you’ll need to replace the tiles.
Also consider that if you add tiles on top of old ones, your floor will be 1/4 to 1/2 inch higher than before, which would impact Here only a complete replacement of the tiles and any other measures to remedy.
Remove individual tiles
Carefully remove the tile from the inside out. Then clean the surface, apply the required amount of tile adhesive and then place the new tile. Once the tile adhesive has dried, you must re-grout the tile. Here too we already have a guide ready for you, which will answer all your questions about tile grouting .
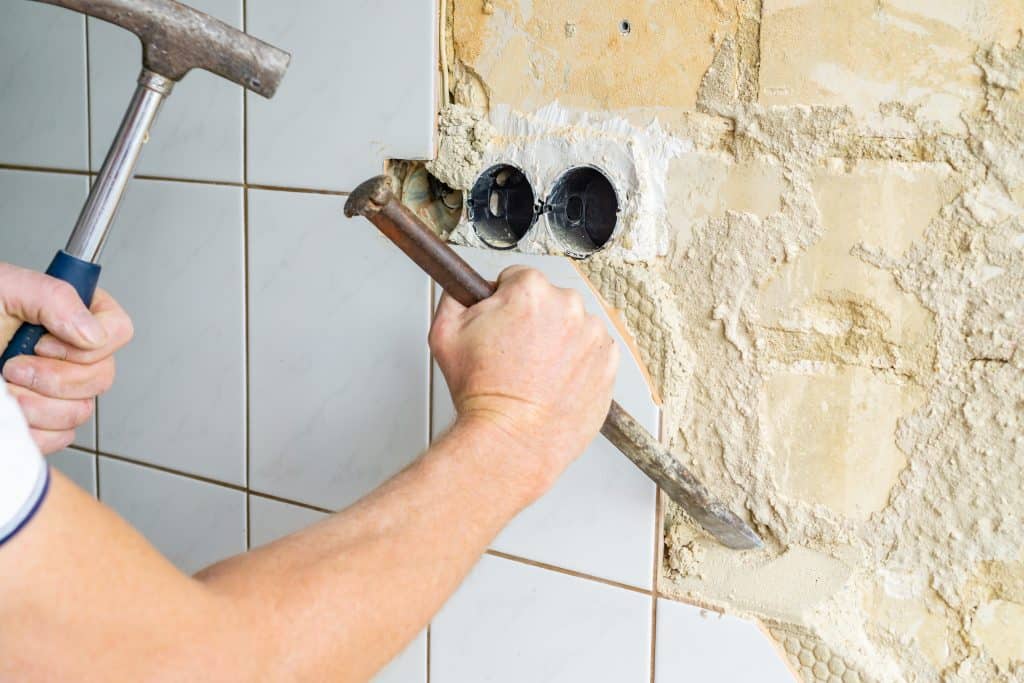
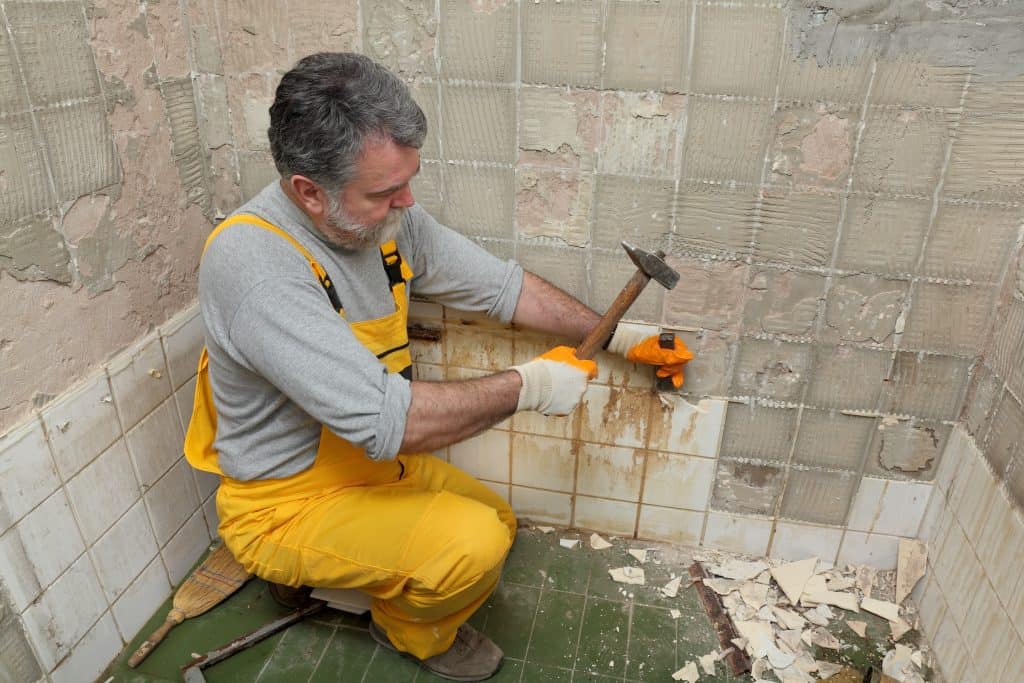
Remove the tiles with a mitten and a chisel
First you should tap off the tile wall with a screwdriver handle or other tool. As soon as you hit a hollow, you hear a dull sound. Grab the mite and chisel here and remove the first tile. Now you have enough attack surface for the electric stamper, which is equipped with a flat chisel attachment.
The cutting edge of the flat chisel has a slope of about 45 degrees and should be set as accurately as possible at this angle. Once you have removed all the tiles, smooth the surface and remove the rubble by placing it in the appropriate container. Only when the surface is clean and level, you can start laying the new tiles.
Professional removal of the tiles
Many professional craft companies remove wall and floor tiles by using a hammer drill. The most effective way to do this is when the hammer eliminates all joints. In many cases, the wall tiles almost fall to the ground almost alone. First of all, of course, inquiries must be made about where electrical cables and water pipes run along. These points should be handled with great care, preferably by hand with a chisel, to prevent any damage.
Even when removing the floor tiles professionals often use the hammer drill. The hammer should have the lowest possible angle to the ground, to prevent deep penetration into the ground and thus possible damage to the floor heating system. Therefore, be sure to get information about how deep the underfloor heating system is in the floor. If this is close to the surface, you should refrain from using the rotary hammer and remove the tiles with the hand chisel and the miter.