
Ceramic tile flooring adds elegance to a home, and when installed correctly will last for a lifetime. By following this guide to ceramic tile flooring installation, you will be able to create a beautiful floor in your home and save some money by doing the work yourself.
To install a ceramic tile floor, start by laying the tiles dry to get the right pattern while trying to minimize waste by needing as few cuts as possible. Mix the thinset mortar and use a trowel to apply it to the subfloor. Add another layer of thinset and comb it with the notched edge of the trowel, leaving grooves in the thinset. Place the tiles on the floor where they will go and press down evenly and firmly. Let the thinset dry. Apply grout to the tile joints and let it dry. The final step is to apply grout sealer.
Installing tile floors requires a lot of preparation and then working quickly. Study the rest of this article carefully to make sure you are prepared to start installing a tile floor and you won’t ruin a bag of mortar or worse.
Tools Needed
- Tape Measure
- Pencil/Pen/Marker
- Chalk Line
- Painters Tape
- Tile Cutter
- Tile Nippers
- Tile Spacers
- Buckets
- Mixing Paddle
- Grout Float
- Notched Trowel
- Sponge/Rags
Lay Out Your Tiles
This article assumes that your subfloor is ready to receive ceramic tiles. The subfloor should be clean, trim should be removed and door jambs should be cut so that tile will fit underneath. Here is a video that goes through this process so that you can see it visually.
It is best to first lay out the tiles dry, so that you can see how they will fit and plan what kind of cuts you will need to make.
Mix tiles from different boxes so that they look more natural and no two identical tiles are next to each other. Take tiles out of their boxes and place them into piles on the floor. Mix them randomly by always placing tiles from different boxes on top of each other.
Find the center of each wall, then snap a chalk line from the center of each wall to the center of its parallel wall. Where the two chalk lines cross is where you will start dry laying your tiles.
If you have an odd shaped room, or you are tiling multiple rooms, this will be more difficult and you may have to do some problem solving to find the best starting point.
You must check that your chalk lines are square by making a three foot mark on one line, a four foot mark on the perpendicular line, then measuring between those two points. If the lines are square, that measurement will be five feet. If your lines are out of square, you have to adjust them to make them square.
It is possible that the room is not square, in this case you will need to adjust your tile layout relative to the walls or you may need to make some difficult cuts on your tiles. A non-square floor raises the difficulty of this job.
Pick a pattern for your tile floor, for a beginner it is best to do a simple pattern like a straight lay, where the tiles line up and make a grid, or a brick/ running bond where the grout line of one row falls in the middle of tiles above and below it. Tiles that are not square will take more planning.
Place the first tile where the two lines intersect, with one edge touching one line and a second edge touching the other line. Lay a half row in both directions from the center to the wall using spacers to make the gaps between tiles.
If the space between the final full tile and the wall is less than one third of a tile, you will need to move the starting tile so that the floor will look balanced. Move the starting tile enough that you end with about half of a tile for the end piece.
Leave a small gap between the last tile and the wall, about the size of the tile spacers. This is because when you lay down the tiles in mortar, grit will get between the spacers and the tiles, and this could push your tile row a tiny bit wider than during the dry lay, so you may need extra space to make sure the row fits properly.
You could choose to lay out every tile for the floor, this would allow you to see where you need to make cuts and make sure you like how the floor looks before doing anything permanent. The drawback of this is that it is time consuming, but it will make you more prepared for the final installation.
Cut The Tiles
It is best to make all of your cuts before you start laying the tiles down with mortar. This way you won’t have problems with the mortar drying while you are cutting tiles. If you have a simple layout and a square room, most of your cuts will be identical and you can make them all at once.
Here is a good tutorial on cutting tiles by different methods: Cutting Tiles
Ceramic tile is soft and suited for cutting with manual tools, like rail cutters, which are fairly cheap (I often see them at thrift stores for extra cheap). If you are making a lot of cuts, it may be worth it to rent a wet saw for the day you will be cutting.
If you need to make round cuts, for drains or water lines, you can use tile nippers to bite away at the tile. If you have many odd cuts to make, you may want to use an angle grinder with a diamond blade, or a diamond blade hole saw for cuts in the middle of a tile. Always wear safety equipment when using power tools.
Mix Thinset Mortar
Follow the instructions on your mortar bag for the amount of water and the necessary consistency. Mix only as much thinset mortar as you are going to use in two hours, because it will start to harden.
You don’t want to mix more than a half of a bag at a time, because it will fill a five gallon bucket almost halfway and any more will make it difficult and messy to mix. Start out with about three quarters of the necessary water and then add water as you need.
You are aiming to get a pancake batter thickness from your mortar. It is possible to mix thinset mortar by hand, but it is going to come out a lot better if you use a drill with a mixing paddle.
Once the thinset is mixed, let it sit for about five minutes, this is called “slaking.” After the mortar has slaked, mix it again for a minute. Never add water after the mortar has slaked, this will weaken it.
Do not wash thinset down the drain, as it can harden on the inside of pipes. If you have extra thinset when you are done, let it dry in the bucket and then use a mallet to knock the thinset off of the sides and bottom, then throw the pieces in the trash.
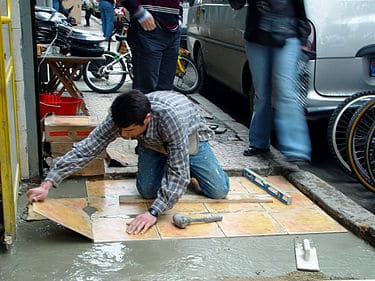
Lay Tile With Thinset Mortar
It is critical to plan your tile laying so that you never have to walk on the ceramic tiles while the mortar is wet. Start with the middle tile that you marked earlier, then move to the far corner. Plan your tile laying so that you end up placing the last tile with an easy exit. Check out this video first before we continue.
If you are tiling on a cement backing board, you need to wet the cement backing board before you start putting wet thinset mortar on. This will make it so that the mortar will dry correctly.
Apply a thin coat of thinset with the flat edge of the trowel. You can start with an area one tile high and three tiles wide. You have to be able to lay all the tiles in place before the mortar starts to harden.
Apply more mortar on top of the layer you just put down, then rake it flat with the notched edge of the trowel holding it at a 45 degree angle and pressing down enough that it makes a scraping sound.
This will create grooves in the thinset, and you want all the grooves to run in the same direction for the entire floor. These grooves allow air to escape when you press the tile down and you get complete coverage of the tile. Make the thinset a universal thickness throughout the floor.
Pick up a tile and back butter it, apply a thin, even layer of thinset mortar to the downside of the tile. Place the tile in its spot and push down firmly, you can give the tile some wiggles to help all of the air escape from underneath. Put spacers in between each tile.
Keep a rag or sponge handy to help wipe up any spilled mortar from on top of the tiles.
Constantly check that each tile is flat and lined up correctly. Any edge that is sticking up will become a tripping hazard and compromise the strength of the floor. If any of the tiles get out of line, they will throw the whole floor out of alignment and you may need to start over.
Work quickly but do not hurry, make sure that every tile is perfectly in place. After you finish make sure that no one steps on the tiles for the thinset manufacturer’s recommended drying time.
Apply Grout
Take all of the spacers out of the tiles and then go through each tile joint with a grout remover or knife to get rid of any pieces of thinset that are sticking up. Be careful not to chip any tiles.
Mix up your grout, following the instructions on the bag. You want the consistency of peanut butter or a little looser. Let the grout slake for about five minutes, then mix it again for a minute.
Scoop the grout out of the bucket with the rubber float trowel. Then work it into the tile joints at diagonal angles. Make sure to press the grout firmly into the joints so that they get filled completely and won’t end up cracking.
Use your damp sponge with a bucket of water to clean grout from the tiles as you go along. Do not press too hard and remove the grout from the tile joints. There will be a film left behind that you can clean away later.
If you are tiling a large floor, you may need to change the water that you are cleaning with if it gets too dirty.
For drying, follow the instructions on the bag. Grout can take up to 72 hours to dry completely.
Seal the Grout
First clean the haze off of the tiles with a dry cloth.
Follow the instructions on the grout sealer. You can buy an applicator bottle that has a nozzle with a brush on it which is easy to use, or you can use a paint brush the size of the grout lines to apply the sealer.
Apply just enough sealer to cover the grout lines. Wipe any excess sealer off with a damp rag, being very careful not to remove the sealer from the grout lines. Let the sealer dry for 30 minutes to an hour and then apply a second coat the same way as the first, being sure to clean up any excess sealer before it dries.
Related Questions
Do you need to install underlayment for ceramic tile floors?
If you have a wooden subfloor, it is necessary to install underlayment, usually a cement backerboard. If your subfloor is concrete, you do not need any additional underlayment.
What is the difference between thinset mortar and grout?
Thinset mortar is a strong adhesive used to attach the tiles to the floor. Grout is used to fill the gap between tiles. Thinset mortar contains lime, while grout does not.