
Did you know (or believe) you could made your own concrete countertops? Gone are the days of cookie-cutter kitchens and builder-grade mediocrity. Owners and buyers in today’s market want updated, edgy, and forward-thinking design, particularly in a highly competitive market, and fabricating concrete countertops brings an industrial feel to your home and can be done rather cost effectively.
To make your own concrete countertops, first measure the area paying particular attention to areas of negative space where things like sinks, faucets and cooktops will rest. Remove the existing counters and begin building your mold using the measurements and schematic taken, making sure to build in the negative spaces. Once the mold is built, reinforce the perimeter with an additional layer of 2×4 for the heavy weight of the concrete.
Mix and pour the concrete into the mold after applying a layer of anti-stick compound, adding any concrete coloring to the mix prior to pouring. Allow the concrete to set before lightly agitating with an electric sander or orbital tool to bring any bubbles to the surface. Carefully remove the mold and buff, stain, polish and seal the slab. Add 3/4″ plywood to the top of the cabinets to support the heavy weight of the concrete and install your new countertops. Finish with caulk and enjoy!
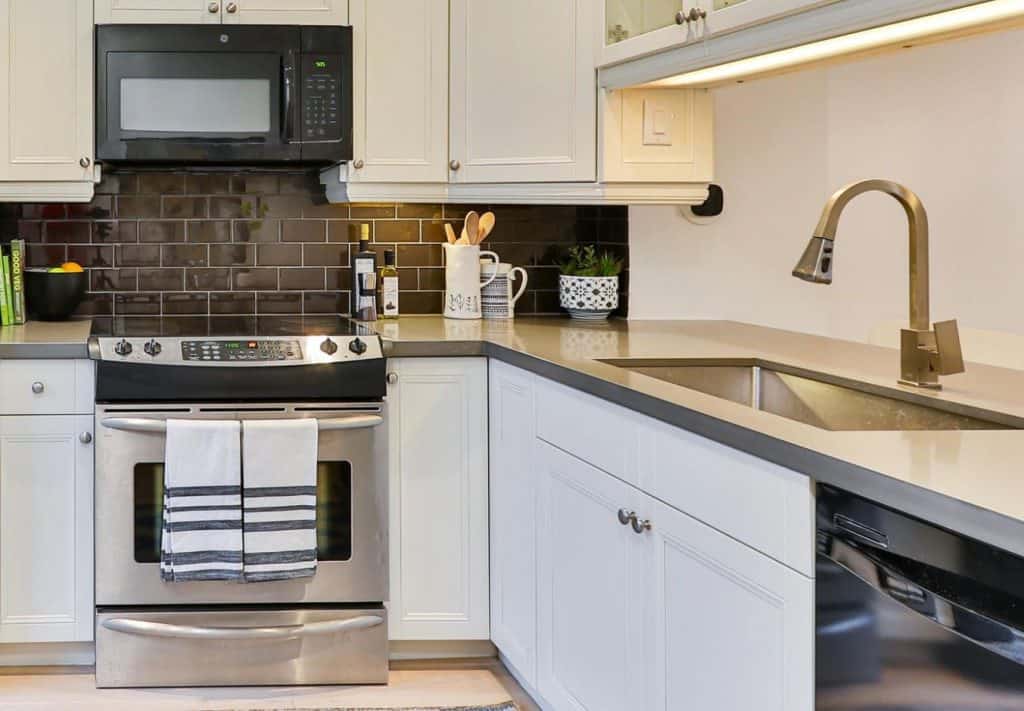
Concrete countertops accentuate an industrial design. Balance the visual significance of concrete counters with metals, woods and plant life to give your kitchen the update it deserves. The remainder of this article will chronicle the project from start to finish and prove that you can make this transformation without enlisting the help (and paying the cost) of a professional!
Required Tools and Materials
- Pry Bar
- Mallet
- Concrete Mixer
- 5-20 Gallon Bucket
- Miter Saw/Skill-Saw
- Drill and Bits
- Tape Measure
- Mask or Respirator
- Silicon Caulk/Caulk Gun
- Concrete Mix
- Concrete Stain/Color
- Power Sander/Sand Paper
- Wire Mesh/Metal Wire
- Orbital Concrete Grinder with Grinding Disk and Burnishing Pad
- Concrete Polish/Sealant
- Plastic Sheeting
- Exacto knife/box cutter
- Melamine Board
How to Take Your Measurements for the Countertops
When measuring something to be built to exact specification, it is often best to bring a scratch piece of paper or graph paper and a pencil to sketch the design and gauge proportion. This will also allow for precise placement of any cutout areas. Drawing a rough sketch of the counters beforehand will allow you to easily mark each measurement in the correct place as you go.
Measure existing countertops prior to removing them if you have countertops that you are replacing. Measuring now is much easier and more accurate than trying to do so with them removed.
If you are working with a blank slate, as in, cabinets are in but countertops are not, take measurements from the wall to 3/4” past the end of the cabinets to allow for the required overhang for the new counters.
Measure any areas to be saved with negative space in the mold to fit around cook tops, sinks, faucets and any other areas of the counters where you need negative space (a cutout). This negative space will be pieces you build out into the mold itself, so take your time now and ensure you get exact measurements now, which will save you valuable time and headache in the long run!
If you have a backsplash installed, ensure you account for the depth of the material and make your measurements from the wall. It is likely you will need to remove the bottom row or two of backsplash prior to installing your concrete countertops and doing so now prior to measuring is a valid approach. Check out our article on how to remove backsplash in your kitchen without damaging the surrounding areas (drywall, adjacent tiles, etc) for tips and tricks for this step!
How to Remove Old Countertops Without Damaging Cabinets
Now that you have your measurements in hand and the schematic of the new countertops drawn, it is time to remove the old countertops and prepare the area for the new concrete counters. And since this is a DIY, or do-it-yourself, article and project, we want to save as much money as possible, meaning saving the existing cabinetry.
The difficulty of removing old countertops while saving the existing kitchen cabinetry depends on the material of the existing countertops, but it can be accomplished with counters of all varieties. First, prep the area by removing all items from the counters and gather the required materials, including a pry bar, hammer or mallet, and metal putty knife. Now we’ll take a look at the process and subtle differences for varying counter materials.
The final piece to keep in mind prior to removing your countertops are the fixtures (things attached to the counters like sinks, cook tops, and even microwaves in some cases) in the kitchen.
Sinks can be either over-mount or under-mount, which simply describes how they are attached or set. For under-mount sinks, check under the cabinets to see if there are under-mount brackets holding the sink in place (typically the case for lighter sinks, like stainless steel). If there are, remove the brackets one-by-one (it is best to have a helping hand for this step to support the sink while you remove the brackets!), which will allow the sink to fall away from the counters.
Heavier under-mount sinks, like porcelain or fired clay, typically require dedicated support structures underneath the cabinets but will not need to be completely removed prior to removing the countertops. Simply score the silicon water barrier between the sink and the counters with an exacto knife or box cutter prior to removing the counters.
Over-mount sinks are typically only held in place with adhesive and gravity. Score the adhesive with your knife prior to removal.
PRO TIP
Ensure the plumbing under the sink is disconnected prior to removal. To save time, simply disconnect the main drain lines.
How to Remove Laminate Countertops
Existing laminate countertops offer the path of least resistance when it comes to removing the counters without damaging the cabinets. To remove laminate countertops, locate and remove the attaching screws, which are typically located near corners. Once the screws are removed, score any caulk so it doesn’t rip the paint with it when you remove the counters.
Run a large putty knife or pry bar between the countertop and support structure (typically particle board or subfloor) and work the counter up and down gently.
Once the closest layer of adhesive is weakened, simply apply upward force with your hands to weaken the remaining layers of adhesive and remove the countertops.
You want to do your best to not split the countertops or use excess force as it could damage the existing cabinets that you’re trying to save. If you hear cracking or popping, you know you’ve used too much force. Most of the time laminate countertops are held in place with general adhesive; if yours are affixed using construction adhesive, removal is going to be a little bit more difficult.
How to Remove Tile Countertops
Tile Counters are typically attached to plaster or wallboard on top of the cabinets, meaning removal should be fairly easy. Remove the trim tiles first by scoring the surrounding grout and chipping each tile away individually. Next, turn your attention to the tiles closest to the backsplash or back wall and repeat the process, removing the entire row before continuing. Now, check the underside of the counters to see if the wallboard is affixed to the cabinets from the bottom or from the top, which is typically held in place by small attaching screws.
If you see screw heads, you’re in luck and just saved yourself about two hours of labor!
Remove the screws from underneath the cabinets and remove the rest of the countertops in one piece via the same methods described in the laminate countertops section.
If you don’t see screw heads, you’re going to need to remove the remaining rows of tiles to gain access to the attaching screws prior to removing the wallboard. Continue row-by-row, scoring the grout between the tiles and chipping each on away individually until all tiles are removed. With a straight edge scraper or metal putty knife, scrape away any remaining grout and mortar until you see the screw heads. Take out the screws and remove the countertops via the previously described methods.
How to Remove Stone Countertops
Although the heaviest of the possible countertops, stone counters are the easiest to remove. There are no screws involved, just adhesive and a particle board or subfloor base. If you have a backsplash installed, remove the bottom row before proceeding.
Simply score the caulking around any inserts (sink, cooktops, etc.) and the back wall or backsplash and apply upwards force to remove the counters. Again, if you hear cracking or popping, the counters are bringing the support with it, which you do not want. If that is the case, work a metal putty knife or pry bar between the counters and the support to weaken the bond of the affixing agent before giving it another shot!
How to Create Your Mold
The mold is the most important part of the entire project. Any imperfections will be evident in the finished product, so make sure to take your time throughout this process. Before we continue, there are two ways to build your form: freestanding or in-place. The size of the countertops or your comfortability level and skill will likely dictate which method you will use.
Transporting a large concrete countertop is simply not feasible, so if your kitchen counter area is expansive, building the mold in-place is likely your best option. Similarly, freestanding molds require more carpentry precision than is required by building them in place.
Ultimately, the choice is over to you on wether to build your mold in-place or freestanding. My personal technique is to build a freestanding mold. Pros and cons of a freestanding mold include:
Pros:
- More room to work
- Easier to polish, seal and finish
- Less construction dust in your home
Cons:
- Requires a higher level of carpentry skill due to the required precision
- Difficult and heavy to carry and install
Regardless of wether you’re building the mold in place or freestanding, one key piece to consider is the overhang of the front edge of your countertops. This will serve to hide the support underneath as well as extend past the top of the cabinets. Typical measurements are 1.5″ extension and overhang (extended down from the top of the counters), so keep this in mind when building your mold.
PRO TIP
Construct your mold using melamine board to help the removal process.
Melamine board is basically just particle board, or compressed sawdust, with a slick exterior finish. It is typically used in closets and pantries, but provides an ideal surface for building a mold for concrete countertops as concrete will not bond to the surface. I highly recommend constructing your mold out of melamine to make the form removal as easy as possible once the countertops cure!
The final piece to consider prior to creating your mold is the edging finish you desire. Edge finishes can be as simple as straight edge to more intricate patterns like bullnose, ogee, or waterfall. Keep in mind the more intricate the edging, the harder it will be to mold.
For more intricate edging, find the desired molding at your local hardware store to be built into the mold, keeping in mind the molding will act as a negative for the final product. Once the molding is attached to your concrete form, run two coats of polyurethane over the exposed wood to prevent the concrete from attaching to the wood when you pour your mix.
In-Place Molds
For in-place molds, we’re going to be constructing the mold where the final product will rest. Prior to constructing the mold, affix whatever support structure you will be using to the top of the cabinets using construction adhesive, L-brackets and screws. This can be anything from MDF to particle board to subfloor to plywood. Basically, anything that will help support the weight of the heavy concrete countertops. I recommend using 1/2″ and 3/4″ to provide the best support without being too bulky.
Following your measurements and diagram, cut the required pieces of melamine to be built into place. A standard table saw works best. If you don’t have a table saw, I recommend getting the pieces cut at your local hardware store when you purchase the melamine instead of using a skill-saw due to the requirement for precision of this step.
Attach each piece of your mold together using predrilled holes and attaching screws. Continue until the mold is completely constructed. Once in place, finish each seem with silicone caulk to ensure there are no gaps in the melamine for concrete to adhere to.
Freestanding Molds
Construct freestanding molds in the same was as was described in the previous section, the only difference being instead of the base being particle board, we’ll build the base using melamine. Pay particular attention to any seems in the base of the mold because any imperfections will affect how level the new countertops rest on the base. This can be fixed later but it is in your best interest to ensure the bottom of the mold is as level as possible to save you time and effort in the long run!
How to Mix and Pour Concrete
Prior to mixing and pouring your concrete, cut wire mesh to fit your mold. Tie pieces together with metal wire to secure in place. This wire mesh will act as an anchor for your concrete countertops, providing increased durability and crack prevention.
Overall color, composition and inserts of the concrete you will pour is over to individual design and preference. There are a number of things you can add to the concrete mix to give the countertops the desired look, such as flecks, glitter, patterns, and concrete dyes. You can find varying recipes and formulas for potential concrete countertop designs and looks with a quick Google search.
I recommend Quickrete concrete mix for countertops as the best mix of cost, quick drying time and durability. Quickrete is also extremely easy to color and add any inserts like flecks and glitter to because of the quicker drying time.
When ready to mix and pour your concrete, follow the instructions on the bag for proper mix-to-water ratio, adding any concrete dyes and glitter as you go. Mix the concrete in as big of a bucket as you can, which will help ensure uniformity in color and design. If you need multiple batches, make sure to measure the amount of coloring or glitter you mix with the concrete to make all batches as close to uniform as possible.
All inserts, inlays or specks should be added to the bottom of your mold prior to pouring the concrete for freestanding forms or added to the top after pouring for in-place forms. Allow the concrete to set for the prescribed time on the bag of mix before continuing.
How to Remove Air Bubbles in the Concrete Countertops
Another extremely important step to ensure your concrete countertops stand the test of time is to remove all air bubbles. Doing so will provide the highest tensile strength and ensure uniformity. Ten minutes of agitation is all you need to complete this step!
After waiting the requisite set time, take an orbital sander or hand sander and go around the outer edges of the mold. It is best done with no actual sand paper on the sander. You are simply trying to agitate the concrete prior to the final portion of dry time. This will force any air bubbles in the concrete to the surface, where you can fill any imperfections after the concrete is completely dried.
How to Remove Your Mold
Removing the mold is as easy as removing the screws you used previously to attach each piece carefully. Once the attaching screws are removed, each piece of melamine should detach with ease (the true benefit of using melamine!). If you encounter a stubborn piece, gently move it back and forth as you pull it away from the concrete to prevent any large imperfections. Keep in mind any relatively small imperfections can be corrected in the coming steps!
With the molding now removed, you’re ready to finish, polish and seal the slab prior to installation!
How to Finish, Polish and Seal Your Slab
Finishing the Slab
Now that the concrete counters are dry, mix a small batch of concrete the same way as described earlier to fill in any imperfections on the surface. Simply apply with your fingers and smooth with a metal putty knife. The wider the putty knife the better to ensure a level finish. Wipe away any excess concrete mix and let dry. It is best to allow the concrete to dry overnight after this step prior to polishing and sealing.
Polishing the Slab
Handheld orbital concrete grinders work best for polishing concrete countertops due to the relative small surface area. Polishing concrete is very similar to sanding wood with a handheld sander. The big difference is the number of passes you will need to make, as your concrete could require as many as ten passes to ensure the best look.
Once you start to see the shine on the surface, swap out the grinding disk with a burnishing pad. This will shift the focus from creating a uniform look to actually polishing the surface of the countertops. Apply a small amount of concrete polish to the burnishing pad and make three passes with the orbital grinder. Allow two hours for the concrete polish to sit before moving on to sealing.
Sealing the Slab
Concrete sealer can be applied with a fresh or clean burnishing pad, brush or roller. My personal technique is to use the orbital grinder with a fresh burnishing pad for concrete countertops. To me, it provides the best finished product in addition to being the fastest.
Apply to coats of sealer in the same manor, paying particular attention to the areas around the sink. Kitchen countertops are subject to a lot of wear and tear so it is in your best interest to take your time to make sure the concrete is appropriately sealed.
How to Install Your New Countertops
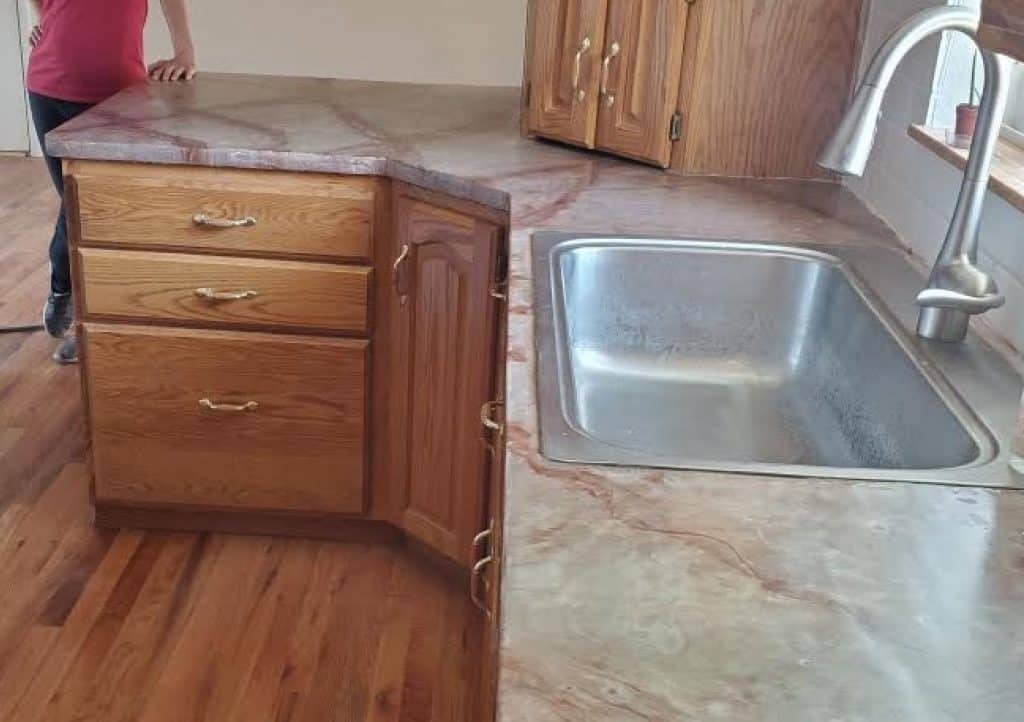
The good news is that if you built in-place molds your new countertops are already installed! Piece of cake, right? If you built freestanding molds (my personal technique, honestly, as it gives you the most space to work), you’ll need help transferring them for install.
Prior to installing your new countertops, make sure you’ve added the required support to the top of your cabinets, which will help spread the load of the weight of the new counters. As discussed earlier, I recommend using some sort of plywood between 1/2″ to 3/4″ as a base for the best support. Simply attach this to the top of the cabinets using construction adhesive or glue and screws.
Once the support is installed, place construction adhesive or glue in an “S” pattern down the length of the plywood and bring your countertops in for install. While installing your new countertops, ensure you push the counters as far back to each wall as you can to achieve the best fit.
Double check the underside of the front of the countertops to ensure uniform gapping and overhang. If you run into issues with the countertops fitting properly, you have about 1/4″ to 3/8″ of wiggle room because of the depth of the drywall. If you need extra room, simply cut out portions of the drywall for the required areas to provide a tight fit. The drywall will be covered with backsplash, the countertop itself or caulking, so don’t worry too much about being precise.
Finishing the Project
With the countertops now installed, it is time to install or reinstall the desired backsplash and caulk the required areas for a water barrier. The color of the caulk is over to your particular design, but I highly recommend using a silicone caulk anywhere there is potential for water. Silicone caulking resists mold buildup and is the most thermal resistant, meaning it is less likely to crack and decay due to the natural expansion and contraction from weather and humidity changes.
Caulk the back of the countertops between the counters and the backsplash, around the sink, and around any inserts like cooktops. Reinsert or reinstall any appliances moved prior to the project.
Your new concrete countertops provide an industrial statement for your new kitchen and will stand the test of time. Metals and natural woods help to accentuate the industrial look, bringing a cohesive and modern look together. Colors, inserts, glitter or specks can also be added to make your concrete countertops look like natural stone. Regardless of the design you are ultimately trying to achieve, concrete countertops are a quick, easy and most importantly, cheap way to give your kitchen the update it deserves!