

Ever since the early
But what about cost, won’t it be expensive to build something of this magnitude? You will be happy to hear that even on a meager budget you will be able to assemble the thrill of the summer. Read below how to build one of these for yourself.
Acquire The Right Plastic Sheeting
The foundation for an epic slide is the sheeting used to create the slide surface. You want a single piece of plastic to create the slide so that no one gets injured on any seams.
You will need a roll of 100 ft by 12 ft heavy duty plastic sheeting. You can also opt for super heavy duty sheeting, 6 millimeter thick or more, for added durability. Keep in mind, you want to avoid skimping out with a thin and flimsy sheeting, otherwise it will tear and possibly injure your participants.
Find The Right Location
Next to the right sheeting, the right location is the next most important factor. As you look for what will become known as the hottest attraction in the neighborhood, you may will want to look for a space that is at least 140 feet long, and at least 10 feet wide, and preferable smooth and without a lot of rocks.
For added fun, find a place that has at least a slight hill. This will help increase your speed, and reduce the need for running and jumping on the slide, making it enjoyable by those who may not be as limber as they were in their youth.
If you are going to be keeping the slide on a permanent or semi-permanent basis, you may want to dig a foundation for your slide. This only needs to be 1/2 inch deep or so, but will allow you to clear out any debris, such as stones, sticks, etc. If you really want to go the extra mile, take a spade or flat shovel and smooth out the surface before moving on to the next step.
Roll Out The Sheeting
You have your spot picked out and prepped, and have your heavy-duty plastic sheeting, now let’s start constructing the slide. Roll out the sheeting, and smooth it out. You want to keep as many wrinkles out of it as possible, allowing for nothing to snag your friends and family as they go down the slide.
Consider having a few friends help with this to help keep it smooth as you work. You may also want some heavy anchors, like bricks or five gallon buckets to help keep it in place.
Fold Down To The Right Size
Once the sheet is in place, you want to fold it in half. This will make the sheet doubly thick, and will also help cushion the ride a little bit. The total width should be about 6 feet.
Once you make the fold, be sure to smooth it out again, both the top and bottom halves.
Add Bumpers As Desired
One of the concerns for such an epic slide will be people sliding off and getting hurt. To prevent this, consider adding bumpers to the sides. You can easily do this with pool noodles, which you can purchase at a local dollar store.
You want to place these pool noodles about six to ten feet apart, the entire length of the sheet, on both sides. You will put these a few inches in from the edge, then you will start at the beginning of the slide and work your way down, rolling the sheet over them as you go. You want to be sure you get a solid bit of sheet under the noodle so it does not slip out, and then anchor it down.
Anchor The Sheet Down
Whether you use bumpers or not, you will want to anchor down your slide. The best thing to use are landscaping anchor pins, which are available from Amazon or your local hardware store.
To anchor it properly, start at the top of your slide, and anchor each corner. Then move to the bottom, and anchor those corners. Finally, put anchor pins every five feet or so. If you are using bumpers, you will want to add at least one at the to and bottom of each noodle. For more stability, add another one at the middle of each noodle.corners. Finally, add anchors about every five feet along both sides.
If you are using bumpers, you will want to add an anchor to the top and bottom of each pool noodle. For added stability, add a third anchor to the middle of each noodle.
Add The Slippery Solution
The trick to an epic slip-and-slide is the slippery solution used to lubricate the length of the slide. Most people use dish soap or shampoo. The challenge to these is that wash off quickly as you run water down the slide.
If you need to do something quickly, use an oil, like baby oil or even olive oil. This will not wash off as easily as soap. You can also give this to the participants to put on their bodies, which is a little more effective.
If you have some time and a little help, just a lubricant like petroleum jelly, and rub it all over the surface of the slide. This will create a seal before you add water, allowing it to adhere to the plastic sheet and preventing it from washing off. This option will create the fastest ride.
Add The Water
Now that you have lubrication taken care of, it is time to add the final component, the water. On the easiest side, just take the hose to the top of the slide and let it run down. You may want to do an initial “watering” to get the entire slide wet before sending people down, then let it run down the slide.
If you aren’t on a significant decline, then you want to look for options to help get the water across the entire slide. You can always put multiple hoses along the length of the slide. This of course assumes you have multiple hoses and faucets. If, on the other hand, you are working with one or two faucets, and need to get as much water across the entire slide as possible, you will want to use a hose splitter, and then put a simple sprinkler on the end to help spray the water across the width of the slide.
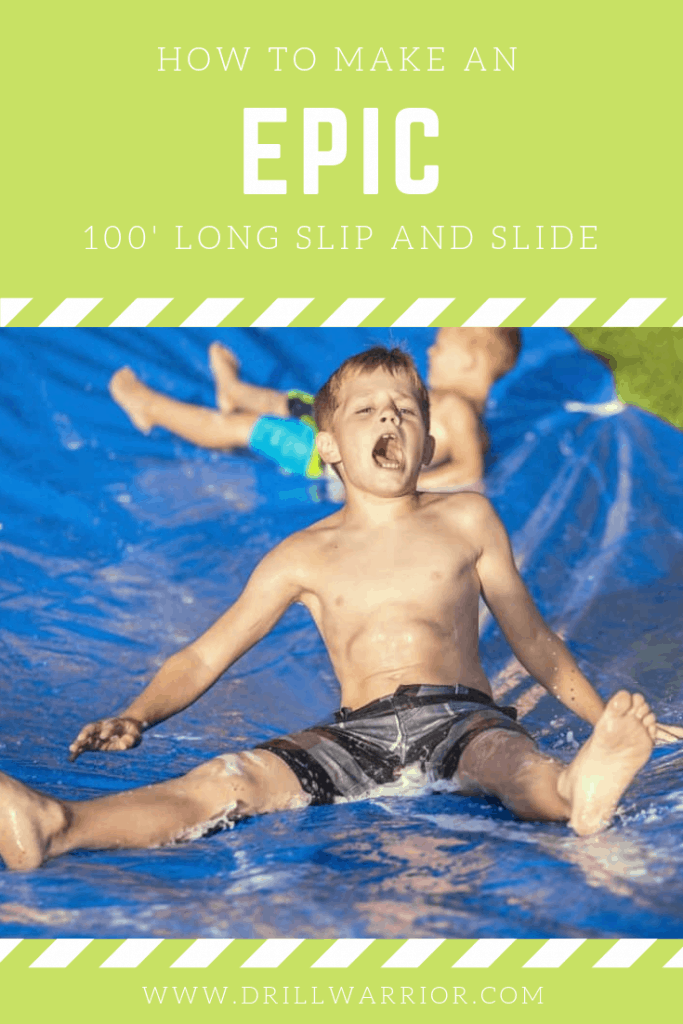
Let The Fun Begin
Now, gather your friends, family, and neighbors, turn the water on, and let the fun begin. To take this epic slide to another level, hook up some kicking music, and get some food on the grill. You will have the biggest party of the year, and will be the talk of the town!
A Few Words Of Caution
As with most things epic, there is a level of risk that comes with this slide. Here are a few things to consider before opening the floodgates on your childhood dream.
First, be care of trees and other obstacles around your slide. Your participants will pick up a lot of speed, and will risk sliding right off the sheet, especially if you have it well lubed. Be sure there is plenty of space around the slide that people can slide into without being hurt.
Next, be careful to allow plenty of room at the end of slide, for the same reason. You want to be sure that not only will people not slide into a house, tree, or other obstacle, but also that they won’t slide out into a street.
Finally, not to be the party pooper, but you may want to check the insurance for the land where the slide will be constructed. Specifically, you want to be sure that should someone get hurt, there is liability insurance to cover the land owner.
Now get out there, and have an epic summer event!