
Drywall should have a beautiful, monolithic appearance. If your drywall seems a little off, you might be wondering how to tell if a drywall installation was done well or not.
You can recognize a bad drywall job because you will see visible joints, screw or nail heads showing, sloppy corners, dipping ceilings, rough surfaces and/or poor cleanup.
It may not be easy for you to recognize these signs of a bad drywall job. In this article, we explain how each of these signs looks and how to fix them.
Visible Joints
The most common drywall sheet is eight feet by four feet. It takes several sheets to cover your entire wall.
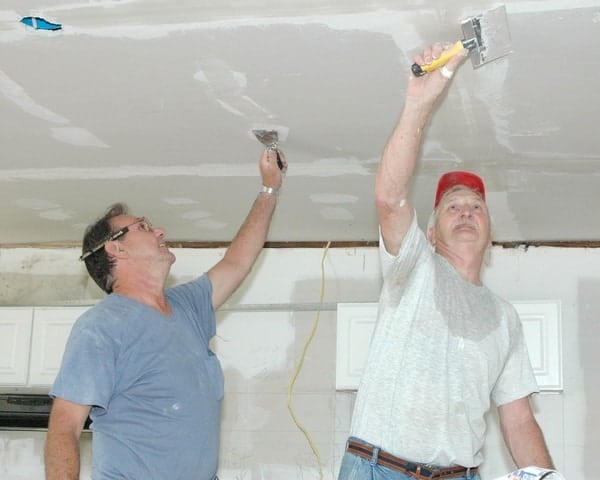
In a bad drywall job, you will be able to tell where one sheet meets another, called the joints or seams. Drywall tape and compound(mud) seal the joints between sheets of drywall. Evidence of a joint includes:
- The exposed edge of drywall tape from a lack of drywall compound.
- Bubbles or creases in the drywall tape.
- An indent between the two sheets of drywall.
- A hump on the wall from the application of too much drywall compound.
In a good drywall installation, you can’t tell where one sheet ends and the other begins. Any indication that there are multiple drywall sheets is a sign of poor installation.
Screw Or Nail Heads Showing
Modern drywallers use Phillips head screws to attach drywall sheets to the wall studs. In an older home, it is possible to find nails attaching drywall to the studs.
A bad drywall job could have visible screw or nail heads popping up or an indent where the installer forgot to cover it with drywall compound. They look like a circle on the wall.
A skilled drywall installer sinks the drywall screws into the sheet about one millimeter. Then they fill the small hole with drywall compound and sand it to a smooth finish.
Sloppy Corners
Where one wall meets the another or the ceiling meets the walls are places to look for drywall mistakes. The corners should be sharp and straight.
Like on joints, corners are sealed with drywall tape and compound. The tape should be completely concealed by the drywall compound.
You can recognize a bad drywall job by wavy corners, indentations, bubbles, creases or gaps. Wall corners should look uniform for their entire length.
Rough Surfaces
If you have smooth walls, it could be easy to spot rough spots that weren’t finished well. Some walls and ceilings are intentionally textured to varying degrees. The texture should all look the same.
You can look out for rough patches, including:
- Raised drywall compound that didn’t get sanded down enough.
- Scratches where low grit sandpaper wasn’t followed up with high grit sandpaper.
- Splashes of drywall compound that got spilled and never cleaned up.
- Dents or scratches in the drywall that were never repaired.
Your walls should appear uniform. Any irregularity could be a sign that the drywaller was not careful.
Dipping Ceilings
Ceilings should be made from 5/8-inch drywall sheets. If cheaper, thinner sheets were used, or nails instead of screws, ceilings could sag and eventually fall down.
Your ceilings are supposed to be flat and stay in place for decades. If your ceiling changes, it could be a sign of a water leak or a bad drywall installation.
Poor Cleanup
Drywall installation creates a huge mess of dust and garbage. Professional drywallers clean up after themselves to get the room ready for painting and other construction work.
If your drywaller left piles of dust or trash after finishing their work, they didn’t do a professional job. Drywall dust can make it hard to paint and damage window or door joints.
If the installer didn’t clean up after themselves, you have to wonder about the rest of the work they did.
How To Hide a Bad Drywall Job
If you inherited a bad drywall job from a previous homeowner or you can’t get your installer to fix their bad work, you might try hiding it yourself. You will need some basic tools, drywall supplies and the proper color of paint to do it.
The paint will blend better if you use leftover paint from the original coat. Using a fresh can of paint might work, but it could also look slightly different than the original. If your new paint doesn’t blend in with the old, you need to paint the entire wall with the new paint to make it uniform.
Drywall installation and fixing is delicate work that takes practice and attention to detail. It also makes a dusty mess from sanding. With some patience, you can fix drywall yourself, but for the best results call in a professional.
What Drywall Compound To Use
Drywall compound is a plaster used to fill joints, adhere paper tape to joints and make drywall repairs. All-purpose compound is the best to choose for DIY repairs.
Drywall mud comes in dry and pre-mixed versions. The dry kinds take some practice to mix properly, but are cheaper and last longer while dry.
Pre-mixed mud is ready to use out of the box. But, it is heavier, more expensive, and can spoil from mold or freezing.
Fixing Scratches, Rough Patches, Bumps
First, you can try smoothing these areas with some sandpaper. Start with low grit sandpaper to get rid of the imperfections, then use higher grits to smooth the surface.
If scratches are deep and don’t blend in, you can fill it with lightweight spackle. If the wall is textured, you can buy a can of spray-on texture to repair a small area. Follow the instructions to adjust the texture size to match your walls.
Once you are happy with the surface, apply fresh paint.
Fixing Visible Seams
To fix a botched drywall seam, you need to remove the paint and mud. You may need to redo the entire joint or just a portion of it.
The steps to fix a drywall seam are:
- Use a four-inch drywall knife to scrape away the tape and drywall compound from the joint.
- Be sure to get all of the old mud off of the wall.
- Sand the entire repair area with 120 grit sandpaper.
- Clean the area and get rid of all of the dust.
- Apply a coat of primer and let it dry.
- Apply a layer of drywall compound over the seam, then apply drywall tape on top of the layer of mud.
- Once the first layer dries, apply a second layer of drywall mud and give it a smooth finish to blend in with the rest of the wall. It helps to use a 10-inch drywall knife to make it extra-flat.
- Let the second layer dry, sand it, then apply a third layer of mud.
- After it dries, sand the repair area again for a final time.
- Apply a coat of primer and let it dry.
- Apply a coat of paint.
Fixing Visible Screw Or Nail Head
If the head is sticking out, remove the paint and drywall mud from the protrusion with a knife. Remove just enough to identify if it is a screw or a nail.
For a screw, screw it in further with a screwdriver. For a nail, pound it in with a hammer.
Next, or if there was an indent from the head not being covered, cover the hole with lightweight spackle. You can use your fingers if you don’t have a putty knife. Smooth it with a wet rag.
Let the spackle dry overnight. Sand it smooth and try to blend it in with the rest of the wall. Apply a coat of matching paint.
Levels Of Drywall Finish and What To Expect
There are five levels of drywall finishes outlined by the Gypsum Association. You can specify with your drywall installer what level of finish you expect to avoid misunderstandings. Anything below your requested level is a sign of a bad drywall job that you can ask to have fixed.
| Level 1 | This is the roughest finish level for drywall installations. It is used in areas that aren’t seen often, like an unfinished basement or attic. Acceptable flaws for level one include tool marks, ridges, screws or nails showing, or visible joints. |
| Level 2 | This level is intended for non-living spaces like garages, warehouses, sheds or workshops. To meet this standard, nail and screw heads should be mostly covered, while some ridges or tool marks are acceptable. |
| Level 3 | This finish level works for your home if you plan to install wallpaper or a heavy texture. To meet the standards of level three, your walls should not have any tool marks, ridges or signs of nails or screws. |
| Level 4 | At this level, the walls should not show any imperfections. Level four finish accepts a light texture and flat paint. |
| Level 5 | This level means adding a skim coat on the entire wall making it completely flat. If you want to paint with a glossy finish, you need to request level five drywall. |
Why Drywall Cracks
Cracked drywall is not necessarily the result of a bad drywall job. Changes in humidity or temperature can cause drywall or the studs to expand or contract and the mud can crack.
Drywall cracks could also be a sign of structural damage like rotting studs or a shifting foundation. It is a good idea to have cracked drywall checked out by a professional to see if the problem is serious.