
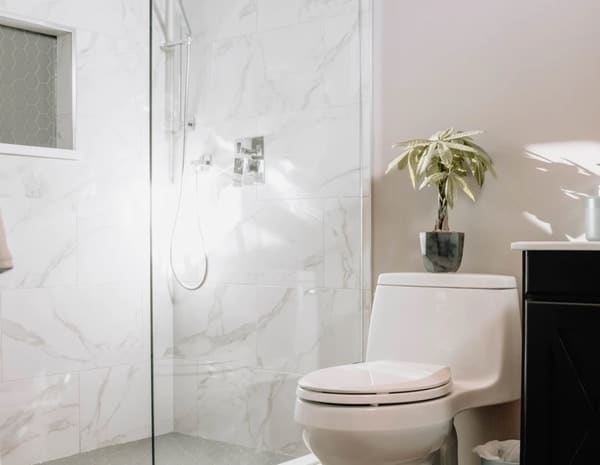
Tile showers are a high-end addition to any bathroom, one that wows prospective buyers, and installation is not only easy but fun! Custom designs, function, and flow of tile showers in a home increase resale value and decrease a home’s average time on market. Furthermore, did you know that bathroom renovations have one of the highest return on investment of any improvements you could do in your home? So, how do you install a tile shower?
The installation of a tile shower begins with demolition (my favorite!). Remove the existing tile or shower insert and cement backing board or drywall, ensuring you are wearing the proper protective equipment. Inspect the infrastructure of the wall paying particular attention to the studs, plumbing, and insulation. Perform any required repairs behind the wall and frame out any benches or built-in shelving. Install the new backing board and tape the seams. Install the tile, starting from the second row and working up, completing one row at a time. Apply grout and grout sealant and enjoy!
The remainder of this article will cover each step in-depth and provide you with numerous “Pro Tips” to make the project as simple and efficient as possible.
Demolition
Before you can build it up, you must tear it down. Shower demolition is one of the most fun to complete because almost nothing will be saved and reused, meaning you need not use the same level of caution as in other areas of the home. That said, it is also one of the most common areas in the house to find hidden problems behind the wall considering the amount of water the area is continually subject to. Let’s dive in!
Prepare the Area
Removing grout and tile in a bathroom kicks up a lot of dust and debris in a small space, so taking measures to keep all that construction mess confined is of the utmost importance (unless you want to be vacuuming and dusting the other areas of your home for the next week).
Cover the doorway with plastic using painter’s tape for easy removal. Any sheet of plastic will do, so don’t feel like you have to spend the $20 on a specific plastic drop cloth or liner. Open any windows in the bathroom to allow contaminants to escape. If you don’t have a window in the bathroom, leave the vents open and untaped to allow air to circulate.
It is also a good idea to close any drains in the sink and tape or cap any exposed pipes if you are completing a total bathroom renovation so contaminants don’t enter the pipes and drains, which is more an issue for clogging than it is for pure contamination.
Protective Equipment
Dust and debris are the main hazards for this project, making a respirator or mask and goggles necessary personal protective equipment (PPE). Gloves will also help protect your hands from shards of tile during the demolition process, but the injury risk to the hands is lower than that of the eyes and lungs. Ultimately, it is over to you how little or much PPE you would like to wear, but ensure you have a mask or respirator and goggles at bare minimum to protect against what could be lasting damage.
Remove Existing Tile or Shower Insert
Showers are usually constructed via one of three methods: completely tile and/or stone, a complete shower insert, or bath insert with 3/4 tile surround. We’ll briefly discuss the removal of each.
Tile and/or Stone Removal
With the grout between tiles removed, take a pry bar or hammer and metal putty knife and work it behind individual tiles, safely prying each away from the cement backing board or drywall. It is not necessary to use caution here because you will be replacing the backing board or drywall with new sheets of water resistant cement backing board prior to installing the new tile shower.
To remove completely tile and/or stone showers, take a grout removal tool or straight edge and scrape out the grout between tiles/stone. This will allow each tile to be removed seamlessly one at a time. Simply trying to pry off tiles without first removing the grout between them will result in more work in the long run as each tile will shatter and take additional time to remove.
Continue the process until all tiles and stones are removed and you are left with only backing board or drywall with remnants of the old mortar.
Bath Insert with 3/4 Tile
The top 3/4s of the removal process remains the same. When you get down to the bath insert (and if you’ve decided to remove it), simply score along the edges with a razor or box cutter and pry away from the wall with a pry bar.
What lies under the insert is anyone’s guess. Newer bath insert products on the market can simply fit over the existing finishes so you may encounter hidden surprises under the insert itself. Regardless of what you find, remove it via the aforementioned methods to prepare your shower for the new tile.
Shower Insert
Complete shower inserts are similar to bath inserts except they cover the entirety of the bathing area. They are usually installed in one of two ways: a four piece fitting complete with a bath insert and one piece for each wall of the shower area or a single piece custom built to fit your shower area. Again, score the edges of each piece with a razor or box cutter so each piece will detach individually before prying away from the wall with a pry bar.
Remove Existing Cement Backing Board or Drywall
As previously discussed, the existing cement backing board or drywall should now be down to remnants of mortar. Locate the studs in the wall and mark their location (precautionary measures so you don’t inadvertently cut into them behind the boards). Using a drywall cutting tool or sawzall, cut into the backing board or drywall to give you a leverage point from which to pull away from the wall.
Most backing board or drywall will pull away easily by hand, but there is no harm in utilizing a pry bar, drywall cutting tool, or sawzall for those stubborn pieces. Remove all drywall screws and bring the area down to the studs. You should see all plumbing, any electrical hidden in the outter wall (may not be to code in your area – if you find electrical hidden behind the shower it is worth a call to a licensed professional as most electrical in a shower area should be housed in the ceiling and not the walls themselves), studs, and insulation.
It is highly important to take the extra time and spend the extra money to remove all cement backing board or drywall in the shower area in order to create a level and smooth surface for your new tile installation.
Preparation
Every project in the home requires sufficient preparation to be successful, and tiling a shower is not different.
Inspect Infrastructure
Once you have the walls down to the studs, it is important to inspect the area, including insulation, pipes, studs, and any wiring that may be present. You are looking for things like mold, deteriorating wood, leaks, and visible moisture. The chances of seeing moisture behind the wall increase exponentially if your shower was built using drywall and not cement backing board, so pay attention to what was used in your shower when ripping it apart.
For copper piping, note any areas of calcification as potential areas that need to be replaced. This usually occurs around joints and bends in the pipes, areas that typically see the most leaking.
For the insulation, damp or moist insulation, or insulation that has areas of darker color, are signs of moisture behind the wall. You will need to replace any insulation where moisture is present.
We spoke to wiring behind a shower wall up above, but to reiterate, wiring should not be present behind a shower wall and should be rerouted through the ceiling prior to completing the install. I have never personally found wiring behind a shower wall but I have heard horror stories of incorrect wiring. If you do not possess the requisite skills to reroute wiring, it is often best left to a professional. The total job shouldn’t take more than an hour, so costs are not prohibitive.
As for the studs, same story here. You are hoping to see dry and sturdy studs once you open up the wall. Any visible moisture signals other issues, so inspect the pipes should you find any. Deteriorating studs must be replaced correctly as bathroom walls are quite frequently load-bearing supports.
Complete Any Required Repairs
With the inspection and requisite repairs complete, now is the time to complete any changes in flow or function of the shower itself. Change any drains and valves, reroute any plumbing, and change any shower head piping if required or desired.
Drains contain a rubber plenum surrounding the drain hole and are designed to last about ten years. This can become of particular importance should your bathroom be located on the second floor of your home as a failure of this simple rubber piece can cause large amounts of water to leak into the space between floors.
Side note, this actually happened to a home of mine, and $13,000 in repairs later I can confidently tell you it is well worth the $4 to change this rubber piece every five years or so! Now is as good a time as any to change this piece out.
Similarly, hot-cold water interchange valves (the valve in the water control housing on the wall) are known to fail after about ten years as well. Although it is a simple fix for a licensed plumber and won’t cause nearly the amount of damage as a leaking drain plenum, failure of the unit will not allow you to get hot water to the shower. As such, it is well worth the $30 part or $100 call to the plumber to have it changed now. If a shower or bath in your home is not receiving hot water, this is the likely culprit.
This is also the time to make any alterations to the shower for things like benches, built-in shelving and soap dishes, changes to shower lighting or plumbing, and new drains. Get these alterations knocked out before installing the new backing board.
Install New Backing Board
With the necessary repairs complete (they might seem negligible or not worth your time and money, but trust me on this one, they can save you massive amounts of future headache and possible water damage!), you can now install the cement backing board to get ready for your new tile. Any area that falls underneath the level of the shower head should be cement backing board and not drywall for all the reasons we’ve previously discussed.
To install new cement backing board, simply measure each wall and cut pieces to fit in your space. Of note, it is a good idea to leave 1/4 inch of expansion space at the bottom of each piece, which allows for the board to expand and contract as it is subject to various environmental changes such as changes in temperature and humidity (extremely common in a bathroom).
With the backing board cut, mark the studs on the board in place and secure them to the studs utilizing cement backing board screws (slightly different than drywall screws – they are a little more bulky and sturdy to withstand the additional weight of the cement backing board). Continue this process until all areas are complete.
Tape Seams
Similarly to the attaching screws, cement backing board seam tape is a little bulkier than standard drywall seam tape (it appears almost like a wire mesh instead of a fabric cloth as is the case for drywall seam tape).
Apply a small amount of thinset or mortar to the seams, apply the seam tape, and drag a putty knife the length of the seam. Remove any excess thinset or mortar. Allow the seams to dry overnight before continuing to the next step.
Install Vapor Barrier or Waterproof Membrane
Steps clearly need to be taken to ensure water and moisture does not creep behind your new tile shower and into the wall. This comes in the form of a vapor barrier or waterproof membrane. Although they sound similar, they are two extremely different ways of waterproofing your shower.
A vapor barrier is a sheet of plastic and is installed behind the cement backing board to protect the studs and insulation while a waterproof membrane is typically painted onto the cement backing board itself. There are pros and cons of each, but I have found that I personally prefer the paint on waterproof membrane.
Some municipalities require a vapor barrier if your shower is located on an exterior wall. If you are unsure of the code in your area, contact a professional before continuing.
To install the waterproof membrane, apply a generous amount to the seems with a paint brush and allow to dry. Roll the remainder of the membrane on with a paint roller and allow to dry. I highly recommend applying two coats of the membrane, so once the first coat is completely dry, apply a second coat in the same manor.
Measure Completed Area for New Tile
It is time to pick out tile, measure, and purchase! Measure the area of the shower to calculate the required amount of tile to purchase. Standard accepted practice is to purchase 10% more tile to account for any cuts required. I have found that 5% additional tile will do the trick in most cases and would only recommend purchasing 10% more if it is a rare tile that might not be in stock at the end of your project.
Be sure to account for things like apex corners (as would be the case for benches or built-in shelving) in your design. Most tile manufacturers also provide corner pieces to match the tile they offer, but it is a good idea to double check prior to making your purchase should your design incorporate apex corners.
Plan the Installation Prior to Beginning
Lay out the design prior to starting, making sure to account for the spacing left for grout. A simple way to make this as accurate as possible is to lay out two rows of tile with spacers on the ground. This will give you a good idea of how many rows will be needed, but more importantly it will give you a visual of how the tiles will land towards the side. You can expect each row to require tile cuts near the corners, and laying it out now will allow you to balance the end pieces correctly.
With all the necessary preparation steps complete, it is time to get to work creating your new tile shower!
Installation
Tile installation remains fairly consistent regardless of where you are putting it, but I’ll cover a few best practice Pro Tips to help make the process as easy as possible!
Install Level Base Board
The first Pro Tip we’ll cover is to attach a level base board to the wall. Take a straight piece of wood and affix it to the wall so that the top edge is where the second row of tiles will rest (starting from the bottom). This will ensure your first row of tiles is completely level and give you a solid foundation from which to continue to the tile installation.
Realize this is completely optional, and some people prefer to start shower tile installations from the top down, but this is something I personally have found to help keep tiles uniform and level throughout the install. Once you’ve reached the top, remove the level base board and finish the bottom row.
Install Tiles
As we touched on above, I prefer to start the installation from the second row on top of the base level board. I will also mark a line down the center of the wall and start from the inside-out, which will ensure each end piece is the same length.
Mix your mortar and have a notched trowel and spacers on hand. Take a generous amount of mortar onto your notched trowel a spread onto the wall. It is best to work in small increments when working with mortar due to the quick drying nature of the material.
With the notched end of your trowel, create equally spaced grooves in the mortar. Press your tile firmly into the mortar and place spacers on all edges (or corners). The more spacers you use, the more likely the tile is to remain level throughout the installation process, so don’t feel like skimping on spacers will save you any time in the long run.
Continue this process along the entire second row (resting on your level base board) until you reach the ends. Measure and cut the end pieces using either a tile saw (circular saw with water to prevent the breaking of tile) or handheld tile cutter. For smaller tiles, I have found it is much more efficient to use a handheld tile cutter. Larger tiles may require a tile saw to cut.
Working from the bottom-up, continue the tile installation one row at a time. I prefer to finish one wall completely before moving to the next wall, but that is honestly over to personal preference. Once complete, let the mortar set overnight.
Apply Grout
The next step is to apply the grout between the tile joints. Consider your overall design and tile choices when choosing your grout color as there are many different color options available on the market. There are also grout dyes that you can purchase to add to white grout should you want to mix your own color. If doing this, I highly recommend mixing a large batch and ensuring you can complete the grout project in one sitting. This will ensure a uniform grout color for the entire project.
Mix your grout and, using a rubber float, work the grout into the joints with a smooth, diagonal motion. I prefer to come back over the same joints for a second time, perpendicular to the first motion. This will give you the best chance of a uniform application.
This is now where some tile experts differ. I prefer to grout the entirety of the shower before wiping off with a sponge while some prefer to work in small sections. My reasoning falls back to the previous suggestion of mixing a lot of grout at once to ensure a uniform color. Grout dries fairly quickly, so you’ll have to work fast if mixing a large batch, hence my suggestion to finish the entirety of the grout prior to wiping clean.
When wiping clean, you want to use as little pressure as possible and a damp sponge (not dripping wet and not just moist – somewhere right in the middle). Too wet and you run the risk of dripping, running, and removing too much of the grout within the joints and too little and you will simply be pushing sand around.
Clean the surface of the tiles using minimal pressure and a circular motion (Pro Tip: the circular motion helps maintain uniformity when compared to wiping perpendicular to the joints). Have two buckets of clean water on hand to rinse your sponge. I like to use two buckets so I can “prewash” my sponge in one bucket to remove large chunks before giving it a solid wash in the second bucket.
Take your time when washing the wall. It may require multiple passes to remove the excess grout and grout haze. Once this step is complete, allow the grout 24 hours to set.
Apply Grout Sealant
The final step is to apply a grout sealant to the entirety of the shower. This will stave off pooling water and protect your grout from leaking, keeping your shower in tip-top shape for years to come!
Additional Considerations
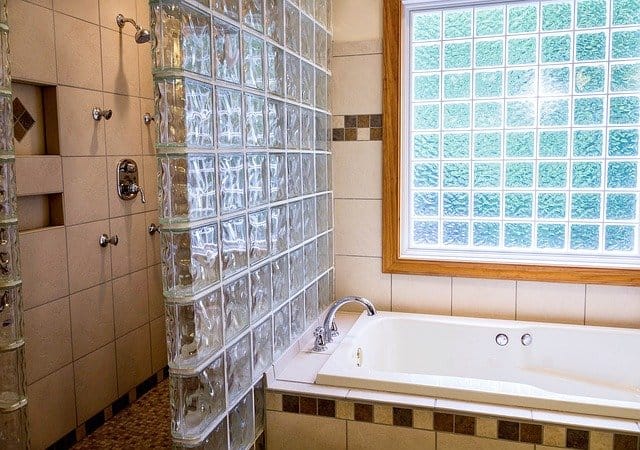
Full Tile Shower
The main “gotcha” here lies with the slope, or lack thereof, in the floor. If you are installing tile or stone on the floor of the shower as well (which I 100% prefer for aesthetics), as opposed to a shower base insert, you will need to create a slight slope inwards towards the drain. This is the most common mistake for weekend warriors when installing tile in a shower – failing to create the proper drainage.
If you simply level the floor, you are liable to get water pooling and collecting on the shower floor, which is a big problem when considering that grout and standing water don’t mix well. For these reasons, I like to include a gradual slope towards the drain by building up 1/4-1/2″ on the edges, depending on the size of your shower.
Inset Shelving
Inset, or built-in, shelving is a modern touch to showers that is gaining popularity amongst buyers. Buyers like anything that appears custom and high-end, and this is no different. Installation is about as simple as it comes also! Simply frame out a cove into your studs prior to installing your cement backing board. This “cove” will end up as your built-in shelving once tiled! Same story here for drainage as you should include a small slope towards the shower opening to fight pooling water.
Corners
Apex corners can be tricky without the right corner pieces. My personal preference is to utilize corner tiles or stone for that high-end appearance. To apply your mortar, scoop some into a plastic bag and cut one corner, as if you were piping a cake. Apply the mortar to the corner and affix your corner pieces. Grout the same way as you would the rest of the tiles.
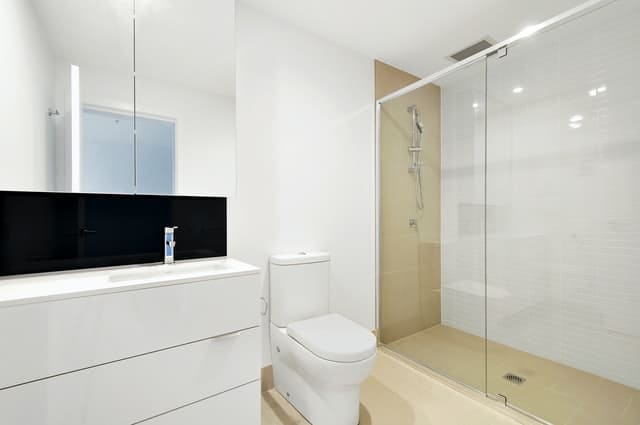
Glass Shower Doors
Although not difficult to install, there is one major “gotcha” with glass shower doors. They must be drilled into place and any time you are drilling tiles already on the wall you run the risk of cracking a tile. To fight this, utilize a diamond-tipped bit and have a water bottle on hand to keep the tiles, and bit, wet as you drill. Ideally you’d like the shower doors to be secured into a stud because of the weight of the units.