
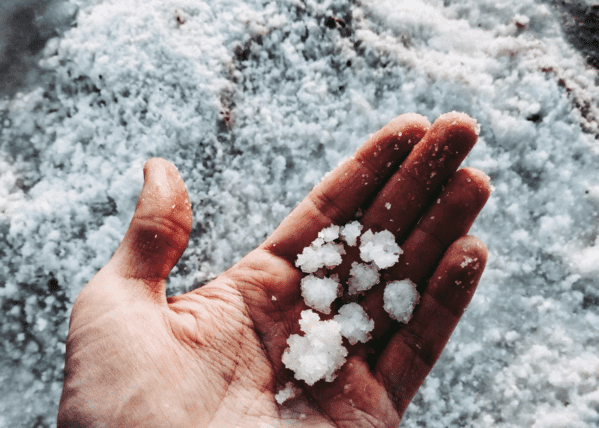
Snowy, cold weather is beautiful and fun for a while, but then it always turns into an icy, dangerous mess. Melting ice around your home is important for your safety, and there are ways you can make homemade ice melts.
The most basic homemade ice melt for steps, walkways, and driveways is salt. Almost everyone has some salt in the home for cooking, and you can simply sprinkle some on ice and it will begin to melt away. You can also stir salt into hot water for an even faster ice melt!
While salt is the simplest and most readily available homemade ice melt, it may not be the best option in all situations. Read this guide and learn more about salt as an ice melt, and some other ways you can make homemade ice melts.
How Does Salt Melt Ice?
Sodium chloride is the chemical name of salt. It is an abundant molecule that is a vital part of the human diet.
Salt melts ice because the freezing temperature of a saltwater mixture is lower than the freezing temperature of water. The freezing temperature of salt is about 15 degrees Fahrenheit, while the freezing temperature of water is 32 degrees Fahrenheit.
When you apply salt to ice, the salt dissolves into the thin layer of liquid water that is on top of the ice. The salty water then comes into contact with more ice and melts it, and this cycle continues until all of the ice is melted.
If you are expecting temperatures below 15 degrees Fahrenheit, salt won’t work to melt the ice because it will just freeze as part of the water.
Can You Use Regular Salt to Melt Ice?

You can use table salt to melt ice, and it works better than rock salt because it is smaller and has more surface area to come into contact with the ice. Most people use rock salt as an ice melt because it is cheaper than table salt.
Rock salt also can be found in large bags better suited for use on large surfaces like driveways and sidewalks. You may not be able to find table salt in large enough packages to make it useful for melting large amounts of ice.
Rock salt also gives you some traction on top of the ice while it is working to melt it. Regular salt will not provide any traction to make walking easier.
How to Use Salt as an Ice Melt
The first thing you need to do to melt ice with salt is to shovel as much snow as possible off of the top of the ice. If you leave the snow on top, you will need to use more salt, which could be harmful to the surface below the ice.
You can use your hands to sprinkle a thin layer of salt onto the ice. It may be hard to tell how much salt you are applying because it can blend in with the snow and ice.
You only need a small amount of salt to melt the ice. There should be space between each crystal of salt, you don’t need a solid layer of salt. Using less salt is better than too much, so be careful not to put too much down.
The ice should be melted in about thirty minutes. If it has not melted after one hour, you may apply more salt.
If you use rock salt, you will be left with bare ground and salt crystals. Those remaining crystals will help to stop more ice from forming.
Homemade Salt Brine for Driveway
Brine is a salty solution that you can use to spray onto your driveway, sidewalk, or steps to melt the ice. You can make a homemade brine, with a slightly lower salt concentration that will be easier on your concrete and plants.
The ingredients for a homemade brine solution are:
- Hot Water – enough to fill a garden sprayer, which you will use to apply the brine
- Salt – 24 ounces per gallon of water
Add the water and the salt to your garden sprayer and close the lid. Shake the container filled with water and salt until all of the salt is dissolved.
Spray a thin layer of the brine onto the ice you want to melt. You don’t have to use too much brine, a little bit will melt a lot of ice.
The brine will not go bad and you can use the same mixture all winter. The only problem you might have is that the brine could corrode the metal parts of the garden sprayer, so be sure to clean it thoroughly when you are done with it for the season.
Drawbacks of Salt as an Ice Melt
Salt can be corrosive to concrete and metal. It can also be harmful to plants.
Applying too much salt to driveways, walkways, and steps made of concrete can start to break them down. Eventually salt may even cause you to need to replace your concrete, which is expensive and difficult.
If plants are exposed to too much salt, they will die. Be thoughtful if you are applying salt near landscaping or grass, as the salty runoff could kill the plants.
Salt is also bad for cars because it can make their steel parts rust. If you drive over a salted driveway you should have the undercarriage of your car washed to remove any salt.
Salty runoff from ice melts can have negative impacts on streams because the salt can become too concentrated in the stream. This harm is mainly caused by municipal road de-icing, but you can lessen the impact of salt on streams by finding alternative ice melts.
What can you use to melt ice besides salt?
If you don’t want to use salt to melt ice, there are a few alternatives that you might already have in your home. Vinegar, rubbing alcohol, hydrogen peroxide and baking soda are all good alternatives to salt as an ice melt.
Most people won’t have great enough quantities of these items to be useful ice melts. If you are going to the store, it is cheaper to buy salt. But, in a pinch, all of these items will work.
Vinegar
You can use straight vinegar to melt ice, or you can dilute to as much as 50% vinegar, 50% water. Diluting the vinegar will also help you to use less vinegar if you don’t have a large amount.
You can pour the vinegar directly out of its bottle for smaller areas. It might be easier to use a sprayer if you want to cover a large area like a driveway.
Vinegar can also help prevent ice from forming. If you are expecting a snow or ice storm and freezing temperatures, you could pre-treat your driveway and walkways with vinegar to help them stay clear.
Rubbing Alcohol
With a freezing point of -20 degrees Fahrenheit, rubbing alcohol could be one of the best alternatives to salt for an ice melt. It will not corrode surfaces as salt does, but it is harmful to pets and can irritate the skin.
The stronger the alcohol you use for ice melting, the more effective it will be. If you use too weak of a concentration, it might freeze if temperatures lower.
You will need a large supply of rubbing alcohol to use as an ice melt on large surfaces like driveways.
Hydrogen Peroxide Ice Melt
This is another household chemical that you can use to melt ice. Hydrogen peroxide will take longer to melt ice than salt though, and you might be waiting up to three hours for the ice to melt.
Hydrogen peroxide can lower the freezing point of water to as much as -68 degrees Fahrenheit. Which is super cold! But you would need a great amount of hydrogen peroxide to achieve these results over your entire driveway, so it may not be practical to use it as an ice melt.
Baking Soda
There is sodium in baking soda, so it has similar ice melting properties to salt. Baking soda is more alkaline than salt and won’t damage concrete or kill plants.
Sprinkling a layer of baking soda onto the ice that you want to melt should do the trick. You can also mix the baking soda in hot water and spray it onto the ice to melt it.
Sand, Kitty Litter, or Coffee Grounds as an Ice Melt
You may have heard you can use some of these items to melt ice, but the truth is that none of these things melt ice on their own. Sand, kitty litter, and coffee grounds work more as a way to add traction to the ice to reduce the chances of slipping and being injured.
These items may help the sun to melt ice because their darker colors will absorb more heat. This can be useful on a sunny day to make ice go away faster.
Be sure not to use clay-based kitty litter, as it will turn into a slippery sludge when it mixes with water. This will make your ice problem even worse!